Connection with the Drone
Wired Connection
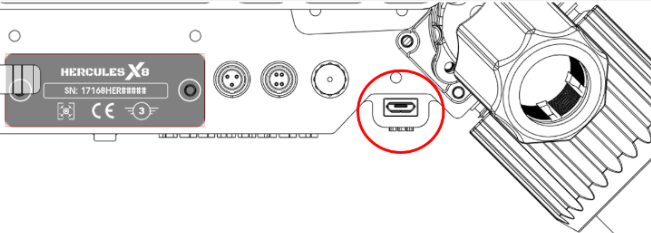
Connect USB cable
- Connect one end of the USB cable to the Drone and the other to the PC
- Wait to hear the musical tone emitted from the autopilot

Figure 23. Connect USB cable
Connect PC with Autopilot
- Run Mission Planner
- Select corresponding COM port “X” in connection menu
- Select 115200 as Baud rate and click connect
- Wait for parameters to load to 100%

Figure 24. Connect PC with Autopilot
Connection from Doodlelabs Telemetry
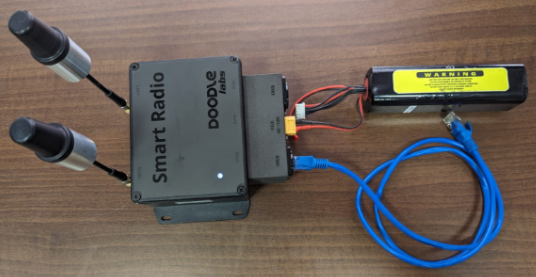
Connect Doodlelab ground modem
- Power up the Drone with the main batteries
- Wait to hear the musical tone emitted from the autopilot
- Power up the Doodlelab modem with a 6 cells battery with xt30 connector
- Connect the Doodlelab ground modem to an ETHERNET port on the PC

Figure 25. Connection from Doodlelabs Telemetry
Connect PC with Autopilot
- Run Mission Planner
- Select TCP on connection menu
- Click Connect and input 192.168.168.11 as IP address and 6000 as port
- Wait for parameters to load to 100%

Figure 26. Connect PC with Autopilot